Sunday, December 9, 2012

All together now


Just realized it has been a month since I have posted.  The dress is now together.  The skirt was Cartridge pleated and then sewn onto the Bodice. 


The skirt is so nice and full.  Downside, it is heavy.  I have always worn my farthingale, made with rigid tubes, under my skirts, and the ribs did not show.  For some strange reason they show through with this skirt.  I think because the skirt is so heavy it is laying against the ribs and not just flowing out.  So I have come up with a solution, which is most likely not period.  Instead of making a heavy underskirt, say of wool, which would pad the farthingale, and be heavier still, and hotter.  I have bought some light weight quilted material.  It is cotton on both sides with a light padding between.  I am making an over skirt for the farthingale to cover it.  This will hide the ribs, and support the heavy skirt.  I actually saw this done for costumes from a movie site.  The movie was Elizabeth with Cate Blanchette.  I was looking at the back stage pictures, and the skirts of the dresses were all hiked up (probably to protect them) and under what showed were these hugh quilted Skirts.  These were much bigger then I even plan on doing.  Of course that was theatre, but in many respects what I'm doing here is theatre also.  In period, the ruling party, and especially Elizabeth, dressed to the nines to show off.  I read that Elizabeth would come out every day onto the upper Walkway (ran between two of the Palace buildings).  She would parade in one of her beautiful gowns.  All the people could come and watch, wave to her, and at time talk with her.  This was one of the qualities that endured Elizabeth to her people.  It was theatre, for the people.  But I'm wandering off, where I like to go. 

The Partlett is coming along quickly.  It is simple, in a way.  One layer of this wonderful material I found at Loraine fabric, in their Discount loft no less (1.99 a yard).  It is Cotton lawn.  Embroidered on it is a white and pink pattern. 

The edge is done with a Pearl piping.  Can't see that too well.  Then I am going to wire this with Milliner wire so it stand out and frames the neck/face.  I see these standing partlets in Moda a Firenze and like them.  If this works I may make a more elaborate one with ruffles on the edge, not pearls. But I wanted a simple yet eloquent look for this partlet, and feel I will achieve it.  This material will be sheer enough so that the blackwork on the Chemise underneath will show through. 

As to the blackwork neck edging.  That is 90% done.  A couple more sessions with the needle should finish it.  Then I plan on tuning the edges. and then Gathering, or pleating, the linen for the chemise to it.  This will be a very full chemise.  The sleeves especially will be extra full, so I can Pouffe out the material.

After that is the Hem on the dress.   Closing fast now.


Tuesday, November 6, 2012

Getting close

The Bodice, is now done.
There are part I am so impressed with myself with and parts I would have done differently.  But overall it came out very good. 

The bodice itself was too loose on the sides.  I ended up taking it in about 2 inches, one to each side.  I took in only one of the side seams (there are two) to keep the back in the proper slant.  The Bodice is now tight to my sides, and look a lot better when on. 

The sleeves are very heavy.  They pull the shoulders out wider then I planned the top to be, but looks correct when worn.  The panels on the sleeves are too wide.  The sleeves do not give the "Tight" look I was looking for.  I went over all my measurements, and I believe I gave myself too much EASE in the sleeves for movement.  A lot of this extra space will be taken up by the Chemise.  I plan on making the these sleeves very wide so I can puff them out. 


Bottom of the Bodice has been turned and slipped stitched.  I will hang the skirt from this.  It is a strong edge.  This was important because....

There is a lot of skirt.  I have four full 55 inch wide panels, and side gores, which are a full 55 inch at the bottom.  So the full width of the bottom of the skirt is 330 inches. 
The gore panels I made with a flat top section, they do not come up to a point. This is a divergence from following the more Period style of skirt that is shown in the design of Eleanor of Toledo Burial Gown.  Those gores do no go to the top of the skirt, start lower on the side.  I had some problem with this design.  First this gown was not as full a skirt as the Pisa dress.  I would not get the fullness I was looking for.  Also this was more of a under dress/Kirtle, then the Pisa dress. No sleeves were ever made nor planned on for this dress.  If I was making an underskirt, I would use this cut.  But I felt this was not correct for this dress.  Looking closely at the photo's of the Pisa dress, it shows a fuller in the front skirt then the ET Burial.   Since I was not copying the ET skirt, I made the top of the gores  six inches wide.  This extend down for four inches before I started cutting the flare.  I did this to make Cartridge pleating easier. So maybe I cheated a little, but after turning and gathering you cannot tell.

I turned down two inches, and tucked under the edge.  I then hand sewed with a fine button hole stitch the turned edge to the skirt.  This edge is now done in one inch cartridge pleats.  Again, since this is a front closure bodice, the skirt also needs to be front closing.  I will have to sew on numerous, and I mean many, closures along the front edge of the skirt.  By doing this I will also be able to wear this Skirt open in the front with a nice underskirt with Forepart.  (I'm planning another set of sleeves for this dress, so I could use it as English also.  Maybe a set of Black Velvet sleeves, and matching Forepart  But I dream ...) 

Next to attach all this skirt to the Bodice.
This is the cartridge pleated skirt laying on top of the Bodice for measuring.  IT FITS.  Now for another several hours of hand sewing.

The Chemise.   Looking at several portraits in the Eleanor of Toledo book I noticed that many of the gown show an embroidered neck on the chemise showing under the gown.  OH BOY  I get to do some black work.  But this neck need to be the right size.  So some careful measurement.  Some looking at my pattern books.  And thinking a one inch wide blackwork design would be nice, I came up with ...
Getting the corners right took some counting, but I'm off and running.  Of course I could have picked an easy quick pattern.  But that isn't me.  The pattern is from my new favorite book,  Bands from Hans Hofer's New Formbuch'len, Augsberg 1545  Charted and plotted for reversible stitching by Linn R Skinner.  This band will show nicely in the neck.  The Partlett over will be sheer enough (fingers crossed) so you will see it. 

The partlett will be the last piece.  The fabric is cotton lawn with a nice pink and green flower embroidered on it.  I found this fabric at the Lorraine Mills in E Prov. RI.  It was only 1.99 a yard on their discount floor.  It is fancy yet suttle.  Hopefully it will work.  About now I'm just praying it does  because I'm getting tired of looking for fabric that will work with this dress and NOT be another two month of sewing (which a partlett, a fancy fancy partlett could be.)


Monday, October 1, 2012

A Little Crazy

Work proceeds on the Bodice Top.  There is a lot of detail work that needs doing.  I have finished sewing in the lining.  The Bodice is front closing.  I used hook and eyes for the closure.  I have seen this done in Janet Arnold's books, and also Eleanor of Toledo's Corset was closed using hook and eyes.  To get a tight fit I have used 20 Sets of Hook and Eyes, "A Little Crazy".  They were tough sewing because they had to be very accurate as to spacing and depth.  Too close to edge and bodice has a gap, to far from edge and it overlaps. Also had to be directly across from each other, or they would pull.  They were also very tiny to hold in place. Only had to resew a couple to make me happy.

The front closure is nice and tight now.  I'm a little concerned about actually hooking them when I put the dress on.  It will be a case of patience I'm sure.
I have sewed on 5 lacing ring to each side of the shoulder/sleeve opening.  The sleeves will be tied on with ribbons.  I purchased some very decorative tips for the ribbons, but ended up being short two, so need to get some more from Guendilina.  I went from thinking of doing only 4 per side to doing 5.  After reading some posts on Margo Anderson's chat regarding a person who wanted to attach some sleeves to an existing bodice (small world) most of the good responders advocated 5 rings, the fifth being center shoulder.  That made sense to me. 

I next need to sew in the ribbons to the sleeve tops.  Next the sleeve panes will be held together with buttons.  I had debated between silver button or jewels in mountings.  Since the sleeves width is more then I want now, I am doing the buttons which will not separate the panes as much.  Now to figure out how and where - spacing - to sew the buttons.

The bottom of the sleeves have now yet been cut to length, I was waiting to fit them into the bodice first and see how they fall. 
There was a lot of finish work on the bodice.  All the small details should add up. 

Wednesday, September 19, 2012

Bodice top

I have piped the top with a lighter rose color.  I debated about doing this.  What I have found is it has actually made the top larger.  The way I have sewed the piping on there is not a full 1/2 seam.  It looks good.  This may be a good thing.  I really did not allow for the Italian chemise I am wearing (to be made) under the dress.  Since this will be gathered and large, this will hopefully take up the little bit of extra width I am experiencing. 

The lining has been added to the bodice.  Next I piped the outer arm holes.  Then the lining was hand sewn in.  
The sleeves have been finished.  The paned sleeve heads are done.  The paned sleeves panes have  been hand sewn to the inside top of the sleeve heads.  There are three seperate pieces for each sleeve.  They fit perfectly to the sleeve heads.  Hurray, I figure and figure, and when it works you go yeahhhhhh.  I will now add ribbons for ties.  I am thinking of four ties on each bodice side. These sleeves are heavy.  I am adding rings to the inside of the bodice arm holes to tie too.  These sleeves can now be removed for hot days.

My mind is now working on the Chemise.  I would really like to smock the top, but since I have never smocked this may be too ambitious for a first attempt.  Simple gathering is what is commonly seen in portraits.  The pattern I have is from the "Realms of Venus" web site.  This style will be easier to fit to the gown. 

The other project will be the Partlet.  For some reason my mind wants to do a pure white lace partlet.  I want to do the Eleanor of Toledo Gold and pearl partlett, but feel it will not go with this gown.  The gown is Rose velvet with silver toned trim.  Will spend the afternoon looking at pictures and going to Lorraine Fabric's and imagining different finds as to how they will look as a partlet.  FUN, YES. 

The skirt needs to be done.  This will be mostly a straight forward project.  Cut panel, add gores, add trim, make Cartridge pleats, add to bodice.  Still a lot of work, by not mind bending.  I have over 8 yards of velvet left, so there will be lots of skirt.  The Bodice is strong, and hanging that much material onto it, I will need to reinforce the lower Edge of bodice some.  Maybe pipe it also.  ????  Will cross that bridge when I get to it. 

Friday, September 7, 2012

Fall start

Fall has arrived, and with it and attempt to get sewing again.

The last several weeks have been spent helping a fellow SCAdian make a dress. She is making a Tudor period dress for her "Hand fasting". She was given 10 yards of a nice cream linen, so that is the base for the dress. Her finance is having an outfit made in purple. They have this purple with gold trim that will be on both outfits. Her dress is loosely based on an Princess Elizabeth dress from when she was 13 yrs old. The turn back sleeves are the same color as the dress, the under dress and under arms are of a beautiful gold fabric, and the dress is trimmed in that Purple/gold trim. Christine sewn before, but never something this hard. She is learning to do hand sewing, whip stitch and button hole stitch. Seeing how the pieces go together she has difficulty. So I do a lot of showing her this, but make sure she does the actual sewing. I have a problem not taking charge and just doing doing it, but that does not teach her. So I make sure it is her work, not mine. I don't think she truly understood the amount of work these dresses require. She has dreams of finishing the dress, making a French Hood to match, and making a Chemise for under it all before 9/22. At this point just getting the dress done on time will be an accomplishment.

The last few rainy days I started back on my dress. I have debated over to Pipe the edges or not. I have looked in Janet Arnold's books and piping seems to have been done in Period. You can see on the edges of many of the existing pieces what looks like edges. In a couple of pieces this was twisted pieces of silk, stitches to edges and slashed. Some look like cords. In Margo Anderson's documentation she clearly states that there is no clear evidence as to whether or not they did or did not use piping. I finally decided to Pipe for looks. I stitched the lining onto the edges with Piping and without the piping. I like the clean look of the edges with Piping. This has added an entire extra layer of sewing to the outfit, but the looks is outstanding. What I have found though is by adding the piping the piece is actually larger, as the piping sticks out. So have to adjust.


The top picture shows two pieces of the panned sleeve, left has piping the right does not.  One of the things I learned was that the piping actually makes the piece wider.  So I have to adjust.  The bottom photo shows the pane sleeve top being assembled,.  This is being made following Margo Anderson's pattern.  In the Pisa dress you cannot see any padding.  But in the dresses in Moda a Frienze you can clearly see padded shoulders.  It could be theorized that the padding has disappeared through time, or never existed in the first place.  I had decided to go with the first argument and this design.  It looks good when held up to the Bodice,  and with all the work/time I've invested, it's a go. 


Friday, July 6, 2012

What I am attempting to create.

I have been asked.  "What are you making"  a legitimate question. 


This is know as the Red Pisa Dress, Early 1560.  It is cut in the style of Eleanor of Toledo.  This dress was not found in the inventory of Eleanor's dresses when she died in 1562.  It is thought to be one of the dresses made for Eleanor's Ladies in Waiting (13 of them) on the occassion of the ceremonial trips to Siena and Rome in 1560.  Most likely they were made in the workshop of her tailor, Mastro Agostino, and mostly he followed the same pattern and techniques as the court gowns he made Eleanor.  The gown had been donated to an Adjacent Convent, San Matteo, where it was on a wooden Statue of the Virgin May.  This gown has now been restored and is on display at the Museo di Plazzo Reale in Pisa.

This is a petticoat.  In Italy the Petticoat would have been worn under the gown.  But in the period of time between 1540 and 1560, when Eleanor was preeminent, the petticoat came out into it's own or out from under the gown.  In the late 1560 it again moved back under the gown. 

http://aneafiles.webs.com/renaissancegallery/extant.html

The above site contain many of the existant Italian pieces, and more detailed information can be found here. 

This dress can also be found in the book  Moda a Firenze 1540 - 1580.  It is often shown with Eleanor's funeral dress, which was able to be partially restored.

What I am doing same/different from this dress.

First I am making a front closing Bodice.  Dispite being an Lady in the SCA, have a dresser is not always available. 

I have worked on the Bodice and Sleeves so far.  I do not have enough trim to effect the double row of trim effect.  But the Trim I am using is wide, and gives a fair representation.  The petticoat is in Rose Cotton Velvet.  The trim is commercial, but accents the Rose color.  The dress is being lined in White Duck.  There is evidence that these dresses had interlining.  Janet Arnold mentions this in her Book "Pattern of Fashion 1560-1620"  A coarse Linen was believed to have been used.  The White duck will provide the strength and form I believe the dress needs. 

The sleeves are paned.  This design is from Margo Anderson's  Patterns.  Looking at the sleeve, and knowing by ability, I decided I could obtain the same look by making these.  I need to modify the top of the Panes now to encoporate the open tabs that can be seen. 

"And so it begins"

The sewing bug has finally bit.  Hot steamy weather has sent me to the cellar sewing room. 

Bodice.  Worked on the fitting some more.  Was not happy with how the shoulder connected.  Ended up attaching the should straps of the white structure material by laying on top and over sewing.  I then used it as a guide and cut out a new velvet bodice piece, and new lining piece with the shoulder straps as part of the front.  ( for clarity purposes.  Bodice is composed of three pieces. 1) Velvet outside.  2) white duck structure  3) pink lining material-should be silk but is poly for price reasons)  After I did all that I discovered I had misjuded the Velvet bodice back, and cut it too small.  Had to recut that piece also.  Waste of velvet.  '
First I worked on the trim for the front and back of the bodice. 
After this was sewn on, I flatlined the structre material, which has the boning channel in the front sewn into it, to the velvet, then I sewed the Bodice together.


The back came out looking to angular, but it follows the straight line of the trim from the shoulders down.  And is equi distant from the side seam,

Next I were the Paned Sleeves.  I made these out of three layers, Velvet, white duck, and pink lining.

see and so it begins take two for the rest of the story.


"And so It begins." take two

I was unaware that the other version had saved, I thought I had lost it, but will keep both. 

Began working on my new dress.  The hot steamy weather has sent me to the cellar sewing room, cool and quiet. 
Day one I worked on the Bodice.  I had the Structure layer, of white duck, pinned together after the fitting.  I had sewn the boning channels for the front into this layer already.  I took this apart and transferred the changes to the other two layers.  I did not like the way I had cut the shoulder straps as seperate pieces from the front bodice.  So I reworked the structure layer to have the shoulder straps with the front section, and recut the Velvet and Lining layers.  Now no shoulder front strap seam.  I also discovered that I had layed out the Velvet bodice back using the wrong mark  thus it was two inches to small, this also was recut. 

With all the correct pieces now on to assembly.  First step was trim. 

Careful edge stitching attached the trim to the Bodice.

Second was flat lining of the White Structure to the Velvet Bodice.  After that I Sewed the seams together, except for the shoulder back. 


Second Sewing Day.   Started work on the Paned sleeves.  These sleeves will be in three layers, like the bodice.  Velvet, White duck, and pink lining.  I decided to pipe the edges.  This will give them a crisp edge, and something for the buttons to be sewn to. 


These are going together quickly.  Found I needed to use my old sewing machine for the piping.  It is doing a much cleaner job then the fancy new(erish) machine.  I have ordered a piping foot for the new machine.  It's not new, most likely 20years old, but newer then the other.  The Old machine is still a trooper.  It is a all metal case machine, with a knee throttle.  You can't kill this baby.  I digress.
The panel are mostly assembled.  Length and top edge need to be worked on.  I want to do a band at the top of trim.  Now need buttons.  Figure I need 42 or more to connect the panes.   Might have to wait until Pennsic to find what I want. 


Next to decide If I want to pipe around the Bodice. 


Wednesday, June 27, 2012

welcome back to me

Has been a while since I updated by diary.  After finishing the gown and coif, I took a break.  One of the reasons was I Took a wonderful trip to Italy.  Spent a couple of weeks clothes shopping and doing prep work to go, then went for 14 wonderful days.  I would go back to the Tuscany area.  My interest are more there then in other parts of Italy, but did enjoy seeing all the various areas, Amalfi coast, Pompii, Capri, Rome, etc. 

Since then I have been in the planning stage for a couple of items.
1st,  Bob's outfit.  I know I promised him the next outfit.  So I went shopping and found all the material I needed before I left for Italy.  That project is still just sitting there.    I did start on his shirts embroidery.  Since this was to be a Henry the VIII outfit, the painting shows his shirts embroidered in Gold.  So I sent away for 5 skeins of antique gold silk thread.  I started to do work on some evenweave linen from Jo-Ann's   I was not happy with the amount of slubs I found in the fabric.  So I spluged and got a piece of nice even weave fabric from Nordic Needle.  This fabric was much nicer.  Doing it on 32 count.  Maybe should have done it on 40, but the scale on this looks right.  It is A acron and cross (X) pattern from,  "Bands from Hans Hofer's New Formbuch'len Augsberg 1545 Lots 18"   Charted and plotted for reversible stitching by Linn R Skinner.  According to the author Hofer's books were printed using woodcuts and were illustration, not instructions.  The author has adapted them into reversible patterns.
2nd  My master work. 
I have cut out the top for my Master work gown. The fabric had some water damage on it from the flood and I had given up on it. I found that I was able to rescue most of it, So I am off, at a snail pace. I have fitted the bodice structure, but it sits there in needles. I need to comitte to the fit and start sewing.  The bodice is always the hardest part.
Had several people over laterly to do sewing, or get ideas:
Loaned a sewing maching out to Josh, so he could make Pennsic clothes for his little daughter and wife.  He's a good kid.  Gave him some basic sewing lessons a few years back.  He caught on quickly.  He not making fancy stuff, just needful.
Evelyn (Kristen) continues to work on a tunic for husband.  It is tough for her to find the time to come over.  I said she can work on it on her own, but she doesn't feel confident enough yet.  So the project linger.
Deb Ross wants more tunic and pants for Pennsic.  She is willing to make a couple of Kirtles also.  We went over the basic patterns, and went cloth shopping at Jo-Ann's.  Now she needs to do cut out and sewing.  Time is her enemy.  She needs to put this on a front burner.  She has two dress, two pants, and several tunic. 
Christine Woods came over last night.  She wants to make a Tudor Dress for her Handfasting in September.  The dress is a cream linen.  She has a beautiful Purple trim.  She has sewn before but has never tried to do something this complicated.  We went over various patterns/styles.  Looks like Early Tudor, Jane Seymore style.  Finding the underskirt, and arms parts to compliment/match will take a couple of shopping trips.  Looks like Puple and Gold fabric.  A trip to Loraine fabic is in the future.  OH Boy  :)

I have promised Bob a fishing trip today, but the weather does not looks like it will cooperate.  So will go out and find something to do with him. 

Wednesday, March 14, 2012

Coif

After two plus years of work, I have finished my Coif.

I had seen these patterns on Reconstructing History's web site.  I was not sure what they actually were, but I was intrigued.  I had been looking at Janet Arnold's new book of Accessories, and had seen this coif that was monochromatic.  I liked it.  I was heavily into Blackwork, and this was curvilinear blackwork in red, or so I thought.  Then I was shopping at Birka, and there at the RH booth were the patterns.  So I got to look at them.  I said, hey I can do this.  No problem.  So I bought three different ones, and - innocent me - figured I could knock these off in no time.  Two years later, what I have learned.
Finding a picture of the actual Coif at the Victoria and Albert Museum web site was a bonus.  The V&A site lets you download very high definition pictures.  These I can then crop or cut and past to a Word page, blow it up, and see the details.  With this in hand I was able to figure out the exact stitches used.  I used this picture also to guide me as to how to shade them with the speckling stitch.  This stitch I had to teach myself the best way to do it.  At first I tried to do it from the front as just very small running stitch, but the best way ended up putting it into a hoop and doing a up and down small stitch.  Monotonous to do, but brain calming.  I could sit for a long time and just work.  The outline and stems were more fun to do.  After doing so much stitching, I now have very nice even spacing and tension.

I did documentation for a competition this weekend.  It is for Athena's Thimble, the SCA Embroidery Guild.  I also approach this with the feeling, "what should I say".  It's an Embroidered Coif.  They know what it is, I know what it is, so what do I say.  Somehow I always find two pages to say.  Hopefully it is enough/correct/understandable etc.  I know what I mean.  Oh well.

Next I want to work on some smaller projects.  One is a gold thread blackwork collar & cuffs to go on Bob's new shirt for his outfit.  Looking at what he (Henry VIII) wore, but Holbein's portrait is not clear.  So the Blackwork at that time was Geometric in shape, so I'm thinking using this pattern from Hans Hofer book from the 1500's that Linn Skinner has figured out. It has acorns in the pattern.  And the pattern is not too wide, so the size will be right.  Have matched the thread, and ordered the Splendor Gold Silk from Nordic Needle.  Waiting for it to come in.

Other projects I want to start on.  Lacis.  Applique.  and Canvas work. 

Thursday, March 8, 2012

Fabric found

Well the trip to Loraine's fabric was a success.  The U-shaped jerkin will be of Medium Old Gold Cotton Velvet.  The detached sleeves also of this fabric.  The Doublet will be of a cream Damask, with a diamond pattern in it.  If I have enough fabric, a second pair of sleeves will be made.  Plan on slashing this fabric and putting deep gold/amber cabochons in between.  Have never slashed fabric, for some reason this goes against my nature.  But think I will try this.  Very Period.  Also picked up material, an off white linen for the shirt. The Gown will be lined in a dark brown, this will match the fur collar and blend the inside of the coat.  The Gold velvet will reflect nicely off it.  Also purchashed 6 yards (not really enough) of a bronz metallic trim.  The design and color are correct.  Where I will use it don't know yet.

Purchased 5 cards of Splendor Old Gold Silk Thread from Nordic Needles for the embroidery.

On a trip to Joann's saw a gold Damask in the Home Decor section which is the exact same shade as the Velvet, so I bought it for a back up for the Doublet. Also got a lot of a deeper gold shade of a silk material for the jerkin lining.

Now have all the major material pieces for the outfit.  There will always be smaller purchases, but overall the material has cost close to 300.00+.  I have had the fur for a lone time so I don't remember how much I paid for it.  I have always said the SCA is not expensive, but the toys will kill you. 

Before I start all this want to finish the Coif.  Tomorrow I will cut out the trial one and make it up.  I have looked closely at the bottom of the real coif.  I have blown up the picture, and what I took for lace at the bottom, is actually the gathered cord channel.  So NO lace. 

Wednesday, March 7, 2012

Time to start a new project.

Have several ideas in mind.  The biggest is for my Husband Bob.  A Fun trimmed Gown, U shapped Jerking, Side lace doublet, Gold Embroidered Trimmed Shirt, and Hose.  King Henry the VIII.  Found the perfect material for the Gown (Coat) but getting all the other pieces to color coordinate, or not clash, is a challenge.  Also cost is always a factor.  Have found some "perfect" fabric, but with 35-50 a yard price tags, I have passed.  Jo-Ann's is having a 40% off sale on Home Decor fabric, and a lot of coupons, some for 50% off this week, so some serious looking is going on.  The leading contender is $44 minus 40% is still $ 27 a yard x 4.5 yds = $120 = ouch.   So off to look a Lorraine fabric again this morning.  Looking, Researching,  looking, thinking, looking, thinking, Reading Tudor Tailor, Looking, Sleeping on it, that is the first part in any project. 
I have looked at all the on-line protraits of Henry VIII.  Interesting, there are multiple portraits of him in the extract same stance, so they copied previous protraits.  The only difference is the color, decoration, of the outfits. 

Embroidered Coif Project.  Update.  Have finally sewed all the paillettes onto the coif.  Have been rinsing out the embroidery tracing lines.  This was done with a water soluable pen, designed for this.  The problem seems to be the ink will run a bit into another area and only shows up after dryin.  This required a couple of days of follow up spot cleaning. Pulling out the white linen from stash and I'm gong to make a mock up - same size - in plain white linen to check on fitting.  I will then use this coif as a prize for the A&S competition in April.  The picture of the original coif shows a border around the outside edge of a simple button hole stitch.  This may have also been used to hold the two layers together.  Doing more research into this.

Time's a wasting.  Lorraine's open at 9 so got to go.   

Thursday, February 23, 2012

Apprentice

I have become an apprentice to Mistress/Baroness Nest verch Tangwistel.  She will guide me in my studies, and help me in my research.  She has studied both Clothing and Embrodiery, so she is the perfect Mistress to work with.  I was presented with my Green Apprentice belt at the Ice Weasel event.  I had prepared the belt for presentation by adding the Celtic Conchos and spots to the belt.  That was my first leather work, although Bob had to punch many of the spots, as my hand were not strong enough to punch them thru. 

I promised pictures


There are a few items I still plan on doing to this gown.  The puffed sleeves do not "puff" enough for me.  I plan on making strips of gathered ilusion and stuff them thru the supports into the gathered section.  This should fill them out.  Also in the Portrait there shows some type of ribbon and bead along the outside seam edge of the velvet sleeves.  I will add these also.  I also plan on making a fake gathered sleeve end to make it appear there is a chemise underneath.  Since there are already two layers of dress, a third will make this too warm for me to wear, so a little faking is needed.

Wednesday, February 22, 2012

Catch up time

I realize it has been sometime since I've posted.  Life happens.  A sad occurance came into my life.  My beautiful Niece died suddenly.  She was only 32 yrs old.  She was so full of life & talented.  She took on life with happiness.  She will be sorely missed.  Too my end, I was in Kentucky with family for two weeks.  When I returned I needed time to get my life back in order.  This put my plans to have the dress done by the SCA event BIRKA on hold.  I was home in time to be able to go to the event and enjoy myself.

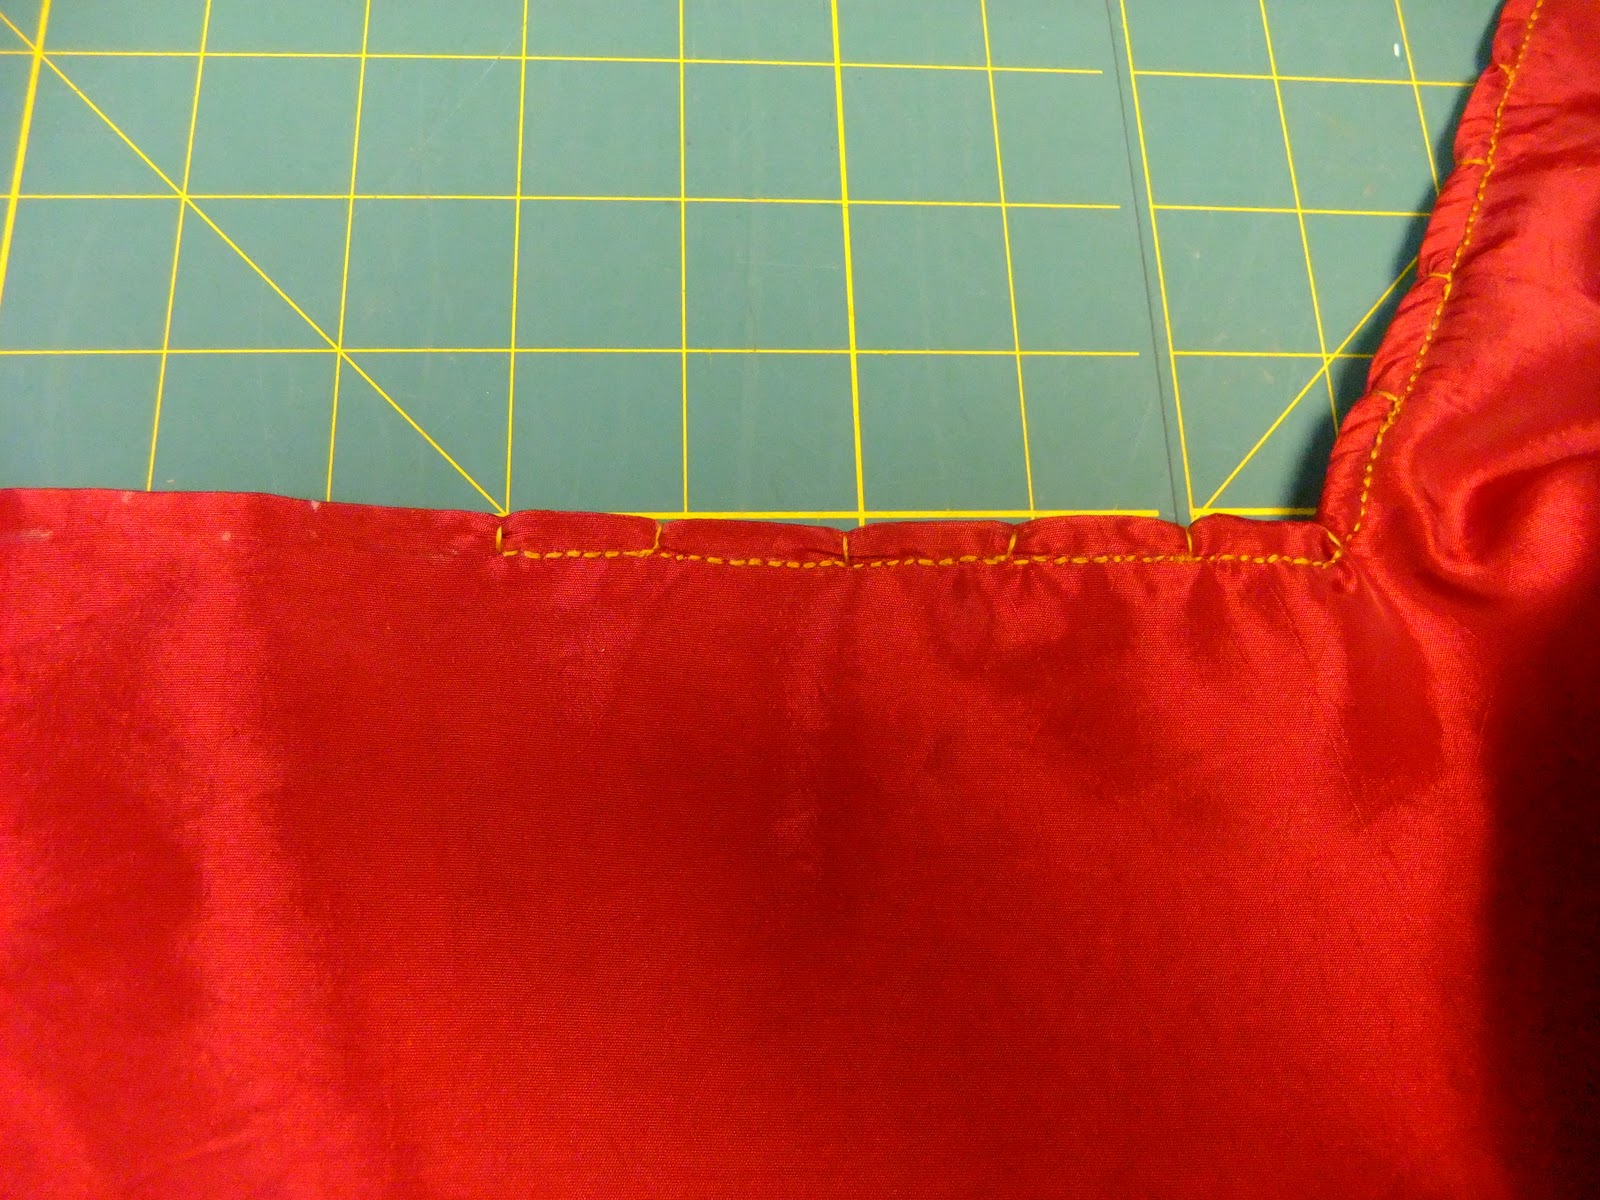
I completed the dress by the Ice Weasel event.  The skirt needed to be attached to the Bodice.  I gathered the skirt with 1 inch Cartridge pleats.  I then sewed each pleat directly to the top.  While gathering and attaching I came to the realization that  when you pull the cords the pleat forms with the thread in the middle, not the bottom.  So when measuring and starting the pleating you must figure an additional 1/2 inch (for the 1 inch pleats) from your starting place.  This may sound confusing, but I understand.  I had some problem at the start and end.  I had to detach and resew the ending because the spacing was incorrect. 
Once the skirt was attached, the hem was done with a 1 1/2 inch turned hem.  I know this is not period, but I turned the hem at the ironing board with Stitch Witch.  The Poly Taffeta was extremely slippery, and I could not turn and pin 8 yards of hem.  I used the SW for holding purposes.  I then hand sewed the hem, as I know that the SW will not hold.  But this did stiffen the hem, and allowed me to stitch the hem evenly  and without pins.
The Parlett was made using a very fine illusion material.  This material gives the sheerness needed, but is &$%#@ stuff to work on.  After cutting and fitting the ilusion material, to prevent edge shredding I bound the outside edges in Double Fold Bias tape.  This fit nicely around the raw edge and gave stability to the Partlett.  I could not double fold the edges of the ilusion.  It will not take a pressed fold.  And being a time factor, I did not have the time to delicatly sew the edge down.  And it kept shredding.  So this was a great solution. 
A crisscross of Trim was sewed on top of the ilusion.  The trim was a light gold sheer trim, with regular diamonds.  I layed out the pattern (many pinnings)  and sewed it down.  I had barely enough trim.  I actually went back to Loraine Fabrics in Pawt.  to see If I could find more.  Both Bob and I searched thru the hugh trim section in hopes of find another yard or two.  I purchased five, and failed to follow my own rules.  "YOU CAN NEVER BUY ENOUGH TRIM"  or "BUY IT ALL".  I managed to place the trim to cover the exposed section, but would have liked more to cover to the edges, so if the parlett puffs out, the trim ends do not show.  Next Partlett will be better.  You learn from every attempt.  I them attached a collar to the partlett.  I wanted the neck to be very open, so the Pearl necklace would show.  I cut the collar 2 inches shorter in width.  Since I was out of trim, I used a gold China time which complemented the sheer trim.  This I sewed to outline the top edges of the collar, and then across the neckline and down the front.  The front edge was to seal that edge from shredding, and for appearence.  This worked fine.  I then sewed a 8mm pearl at each crossing of the sheer trim.  I debated between 6mm and 8mm pearls.  The 6mm fit nicely into the diamon of the trim, the mm popped out but looked more like the Partlett of Eleanor of Toledo.  So I went with the Larger Pearl, and it looked good. 

I will post pictures of the finished pieces next.

I presented the dress at the Tailor Guild panel at the SCA Ice Weasel event.  It was very well received.  This dress was not the dress decided upon as my Master Work, thus I was not given my Master.  This I knew when making this dress, that it was not "the" Dress.  This was done as a Predress.  I wanted to work out some fitting and making problems.  This dress presented the following challenges to me.  1)How to do the back side lacing and fitting.  The pattern base I used, was period.  There is no side seam, as Modern pattern have.  This made fitting difficult on me.  2) How to do the sleeve Gathers.  I built a support structure into the sleeves to hold the gathers.   3) How to do the Undersleeve.  The first sleeves I made had a full undersleeve.  Though this worked, Did not give the look I wanted as the bottom required a seperate band to gather on.   So I followed the suggestion in Reconstructing History pattern, and sewed just a seperate piece -velvet - to the gathered section.  4) Dress over dress.  I had to cut the overdress slightly larger so it would fit over the underdress.  Figuring out all the differences was difficult.  The neckline had to be hand cut after, as this was not to be larger, but wider.
5) Hand sewed button holes.  The underdress was lined in a heavy cotton broadcloth.  This does not "give" when the awl goes thru, and was hard to sew.  The same was true of the Poly Taffeta.  The lacing holes are small as a result and hard to lace.  I made extra long lacings, but will always need assistance getting into and out of this dress. 

I plan on stuffing the top of the dress sleeves with pieces of gathered ilusion.  The sleeves look flat, even though they are gathered.  This should puff them out as they appear in the Portrait.
Overall I am satified with the dress.

Currently I am working on my other major project.  I am now sewing 300+ Paillettes onto the finished embroidery.  I finally found a way of getting the Paillettes.  After several attempts, I located the Krenik paillettes.  You need to order them thru the internet to a local shop.  There is a vendor in Walpole - Hoops and Needles on Rt 27 (in downtown) who can do this.  I ordered 10 grams of size 12, but they sent me size 14.  These are only a .01mm diffence in size, and I can barely tell the difference.  I had already sewed the 12's onto the coif, but had stretched these out.  I will fill in that section with 14 and I think that will cause the overall look to blend.  You would need to get REAL close to tell the difference.
This may be done by the March event. 

I am planning on my next works.  I had promised Bob a outfit.  This is to be a Henry VIII coat w/fur collar and Knee length doublet(s).  Having a problem finding the "right" material to go with the coat material for the doulet.  I had found this wonderful brown fabric with a gold pattern featuring leaping dear and other hunting/animals for the coat.  Doing a brown "fur" collar.  It is a strange shade of brown/gold.  I would like to do an offwhite/cream doublet with some gold in it.  This fabric so far aludes me.   Oh dear, I will have to go fabric shopping. :-)

I then will do the Tailor Guild master work.  As there will most like not be another meeting soon, I have plenty of time. 

Saturday, January 7, 2012

update 1/7/2012


Have been working on the top of the dress.  1st had to determine how to enlarge the pattern to fit over the underdress.  I cut the dress about 1/4 of an inch larger then the pattern.  This worked out well, but the back was not large enough to meet.  I ended up letting out the center back seam . The two layers of material I decided were not going to be solid enough for the top.  I have a very light Taffata, and a heavier silk (polyester) lining.  The skirt needs to be sew onto this top, and I feared the weight would cause pulling.  So Picture one show cutting out a red linen interlining.  This I flat lined to the under lining material. I attached the two layer by ballon method, I then hand turned the bottom of the bodice towards each other and whipped stitched the edge.  I now have a nice solid bottom to attach the cartridge pleats to. 
I increased the width of the sleeves by 4 inches, so there is more to gather.  I used the same support structure I used for the linen sleeves to prevent sagging.  These sleeves were then gathered directly onto the velvet undersleeve.  I stay stitched the armhole opening together, and gathered the sleeve onto the Bodice.  Had to use my best guess as to where the undersleeve attaches to the gathered top in regards to the back center seam.  The gather part has a center botton seam, and the velvet has a seam in the back to the arm.  So had to off center this.  Moved it two inches over. Came out OK.  Maybe I should have move it more, but It works.
Last.  around the neck of the dress you can clearly see a seam that runs about 1/4 inch down.  This creates a look, but also help stablize the neck edge.  It is hard to tell exactly what was done.  I decided to Hand stitch a seam around the top, using back stitch, with a button hole stitch every inch, which I pulled to give a little indent. I am using antique gold colored silk thread.  The partlett will have the same old gold look to it.
The top of the skirt has been turned 1 1/2 inch.  A band of 1 inch red linen was inserted, and the edge turned in.  I used stitch witch to do this, as the idea of hand sewing 290 inches of edging were undaunting.  Also looks nice.  I have measured out the band for 1 inch pleats.  I like the size, but the tale will be attaching these to the bodice. 
Next up will be the back lacing holes.  Didn't count but should be 30-40 button holes to sew.  Have a strong red button threads, which I like to use.  Finding button thread in red suprised me, but it's perfect.  I did the Linen dresses button holes in this tread, and it works.  But that was a heavier material then this so I will experiment on scrape first.
Off to do more hand sewing.